How to Get Rid of Hard Stains on a Tile Floor | Easy Tile Cleaning Tips
Ever passed through your tile floor and spotted a stubborn stain that just wouldn’t come out no matter how much you scrubbed it? Maybe it got there by a spilt drink; in any case, muddy shoe prints would be right there to help in chasing away all cleanliness. Do you wonder whether you use the wrong cleaner or damage your beautiful tiles with every swipe? You aren’t the only one. Tile floors are durable, yet stains hang on to them like an uninvited guest.
What is the secret to lifting those marks and reinstating that fresh, clean look? Grout, grime, grease, and hard water; the answer is here in battle formation. In this blog, we teach you the art of removing tough stains from a tile floor like a pro, along with tips suggested by experts, tools, and methods that work and won’t harm your tiles.
Understanding the Enemy: Especially Why Some Tile Stains Are So Tough
Baking soda is a gentle abrasive cleaner and may be employed on organic and oil-based stains, as per Bond Cleaning Toowoomba. White vinegar is a miracle for cleaning tiles of soap scum and mineral buildup. Tough dirt can be loosened and taken away with hydrogen peroxide, especially along grout lines. Natural stones like marble or slate are usually quite porous and hence much more prone to staining if not sealed properly.
Thus, along with tile types, grout lines also serve as a significant magnet for stains. Their porous nature makes them absorb spills and dirt too fast, turning them into discoloured and ugly stains over time. Common stains come from food, spilt drinks, rust, moulds, mildew, grease, or even hard water deposits. Knowing exactly which stain and tile you are working with will help in making the right pair of choices for the safest and most effective tile-cleaning solution.
Basic Equipment for Stain Removal
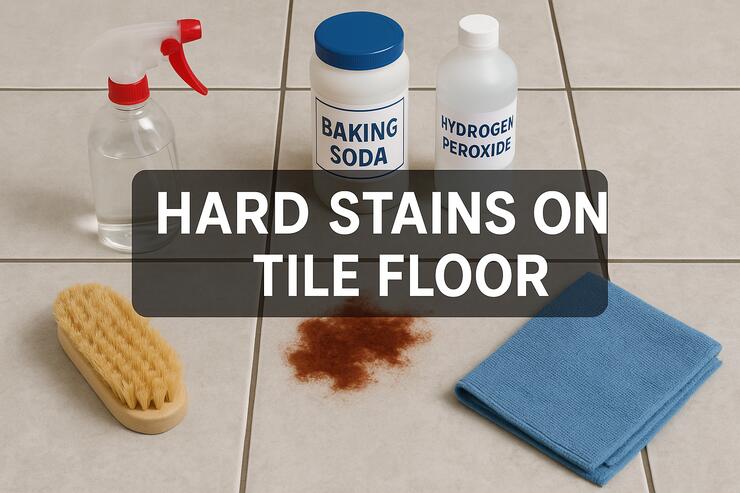
Providing an effective cleaning of tile stains begins with proper tools and products. Because it is a base for most cleaning products, warm water is a basic kit component. Baking soda is a gentle abrasive cleaner and can be applied to oil-based as well as organic stains. White vinegar works wonderfully to strip soap scum and mineral deposits from tile. Hydrogen peroxide can be used to dislodge and break up heavy grime, particularly on the grout lines.
Other easy things from your kitchen might be a solution of mild dish soap to break down oil and residue, along with lemon juice for its acidic power in lifting stains. Be cautious when using lemon juice on natural stones. A soft-bristled scrub brush or perhaps an old toothbrush does well in scrubbing grout and tight corners, while microfiber cloths aid in gentle wiping.
Step 1: Preparation of Tile Flooring
The application of any cleaner comes second to removing all loose material. Dust, crumb, or dirt fragments from the floor should be swept or vacuumed thoroughly. It will not allow any dirt to scratch the tile during
cleaning. Once the floor is swept, mop it with warm water to which drops of a very mild dishwashing soap have been The last act is to rinse off any surface grime, preparing the tile for spot treatment. The moment after washing, let the floor dry untouched. A dry surface makes the cleaning solution much more efficient, less diluted.
Step 2: Baking Soda and Vinegar for Everyday Stains
Common stains, coffee, juice, sauce splatters, or general dirt should generally be treated with baking soda and vinegar. Baking soda and water should be formed into a paste, then painted on the stained area. Leave it for about 10 to 15 minutes. Then, spray or pour white vinegar all over the paste. The bubbles will loosen the stains from the tile.
Gently sweep this area with a soft-bristled brush using circular motions. Clean with warm water and wipe clean using a microfiber towel. This natural treatment can work for the majority of tiles, ceramic and porcelain being especially considered by many homeowners as natural alternatives instead of harder chemicals.
Step 3: The Last Stain Harshly Cleaned with Hydrogen Peroxide
Hydrogen peroxide is the ultimate cleaner for grease spots, mildew or mould, or grounding dirt of any kind, or risk ruining your tile. Use the hydrogen peroxide right away and leave it on for ten to twenty minutes. Especially, if the dirt is being forced into the grout lines or textured areas, this will loosen it up.
For an extra dislodging effect, mix hydrogen peroxide with baking soda to form a fizzy paste that will attack the grime. Then, to get it off, lightly scrub the stain with a soft brush, rinse it with water, and dry it off immediately. Always remember to spot test one area first, especially on colored tiles or grout, just to be sure they won’t bleach.
Step 4: A Natural Solution for Rust and Hard Water Circumstances Is Lemon Juice
When faced with a hard water spot or rust mark, lemon juice goes a long way. The naturally occurring acidic properties of lemon enable it to break apart mineral buildup, without resorting to synthetic chemicals. The lemon juice has to be placed onto the stain, and all must be left to interact for from five to ten minutes.
For the more obstinate stains, sprinkle some baking soda or salt onto the stain after applying lemon juice, then scrub the paste on the stain with a brush. The paste can then be washed off without any problem. Do not try this with natural stone tiles like marble or travertine, as the acid might etch and mash up the surface.
Step 5: Deep Cleaning of the Grout
Even if the tiles look clean, stained grout will bring the whole floor into a dull shade. Bake soda and hydrogen peroxide: after mixing, these form a paste that is to be applied onto the grout lines and kept for 10-15 minutes. After this time, a gentle scrub with an old toothbrush will clean the grout; rinse and wipe it clean.
If your grout is dyed, avoid using hydrogen peroxide so that its bleaching properties do not discolour the grout; opt instead for a mixture of baking soda and dish soap. Another thing to consider, seal your grout once every year to keep it resistant to future stains.
When to Make Use of Commercial Cleaners
Sometimes, with simply DIY solutions, your stubborn problem will not go the grease and grime in kitchens, bathrooms, or high-traffic areas can be too heavy for the average cleaner. So in this case, a commercial tile and grout cleaner is probably your best choice. It should be a ph-balanced cleaner meant for your particular type of tile. Always do an inconspicuous test spot and adhere to the instructions of the manufacturer.
Unless you are working on white tiles with white grout, do not use bleach-based cleaners, as they tend to yellow or fade with time.
Conclusion
The very tough tile stains can be intimidating, but are far from being permanent. Using some simple household ingredients and the right technique, you can really bring your tile floor back to glory. You have been equipped with every solution needed to safely and effectively combat those grease spills, mouldy grout, or water stains.